How to talk with Web Components in React and Angular
Creating framework-agnostic components with Angular Elements

In this article, I use Nx to create a monorepo with applications in Angular and React, and a library with Angular Elements. Then we consume these custom elements and communicate with them in our apps.
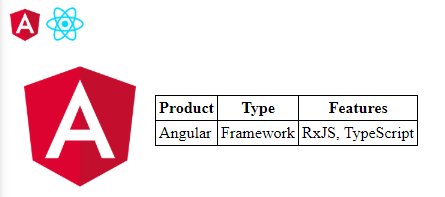
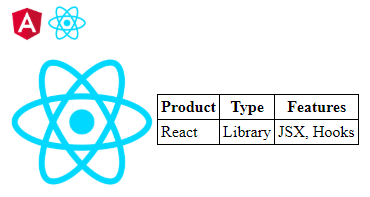
Here’s what we create in this article:
The application we create has one page for Angular and one for React. The add button and shopping cart are Web Components made with Angular Elements. There is no state between the pages. The main point of the article is to show how we can use the same custom elements in different frameworks.
This isn’t a deep-dive, but I will walk-through the important parts for Web Component support in Angular and React. I’m not going to present all the HTML and CSS that I use but if you want to follow along all the code is here: Example code on GitHub. 📜
Web Components
Web Components is a web standard for defining new HTML elements in a framework-agnostic way. Since Web Components build on web standards, it opens up opportunities for code sharing across JavaScript frameworks.

Web Components are a set of technologies that let you create custom HTML elements compatible with regular HTML:
Custom Elements to create custom HTML Elements.
Shadow DOM encapsulates style and markup.
ES Modules for module handling.
HTML Template to declare content that can be rendered at run-time.
If you are interested in gaining more knowledge in this technology, then I recommend reading these articles:
Angular Elements
Angular Elements provides a way to convert Angular components to native Web Components.
The @angular/elements package exports a [createCustomElement](https://angular.io/api/elements/createCustomElement)() API that provides a bridge from Angular's component interface and change detection functionality to the built-in DOM API.
Transforming a component to a custom element makes all of the required Angular infrastructure available to the browser, mapping Angular functionality to the corresponding native HTML equivalents.
For more in-depth on Angular Elements, check out these articles by Jia Li:
OK, I wanted to keep the intro brief so we can start coding! 😏
Creating the Workspace
Since we want to be able to use React, the Angular CLI is not enough this time. Fortunately, Nrwl has developed the open-source toolkit Nx that extends the Angular CLI capabilities to React and helps us manage workspaces in a monorepo way.
We are using Nx to build Angular and React applications with a library of shared web components. Let’s start by creating a workspace:
npx create-nx-workspace reactangular

I’m starting with an empty workspace. After the installation, we need to add Angular and React capabilities to the workspace:
cd reactangular
ng add @nrwl/angular
ng add @nrwl/react
Now, we are ready to create the applications.
Angular App
First, we create an Angular application:
ng g @nrwl/angular:app angularapp --defaults
I have added some HTML and styles to spice the page up. It’s not relevant to our story of web components, but if you are interested, you can check the code on GitHub. Let’s make sure that it’s working:
ng serve -o angularapp
The first application is working! Awesome! 😻
Let’s see if we can get React working now that we have the ball rolling.
React App
Next, we create a React application:
ng g @nrwl/react:app reactapp --defaults
Also, I added a bit of fragrance to the code. Now let’s check that it runs:
ng serve reactapp
It’s also working! Beautiful! 😍
Let’s have a look at the scripts next to get a better developer experience.
Running in parallel
Since we have to run more than one application at once, I use a package called Concurrently to run multiple commands in parallel.
npm i concurrently -D
In this case, I want to start my Angular and React applications at the same time, so edit the start script inpackage.json.
"start": "concurrently \"ng serve -o angularapp\" \"ng serve reactapp --port 4201\""
Since we need to use different ports, we send in the port flag to the React app. So, instead of running scripts in two terminals, we can just run:
npm start
We can start both applications with one script! 🎉
Now that we have our applications running let’s start with the elements library.
Angular Elements Library
We can add a new library project for our Angular Elements:
ng g @nrwl/angular:lib elements --defaults
With one CLI command, we add the elements package and make changes in angular.json:
ng add @angular/elements
Add-to-cart Button
Now let’s create add-to-cart.component that has the input property type to know what we are adding to the cart and then outputs the addToCart event with this type.
import { Component, EventEmitter, Output, Input } from '@angular/core';

@Component({
  template: `
    <button mat-raised-button color="primary" (click)="add()">Buy</button>
  `
})
export class AddToCartComponent {
  @Input() type: string;
  @Output() addToCart = new EventEmitter<string>();

  add() {
    this.addToCart.emit(this.type);
  }
}
Now that we have the component, we need to change elements.module.ts to define it as a custom element. Notice, that we do not have a regular bootstrap. Instead, we do a manual bootstrap where we define the custom element and then add it to entryComponents.
A component can also be bootstrapped imperatively in the module’s
*ngDoBootstrap()method. The `@NgModule.bootstrap`* property tells the compiler that this is an entry component and it should generate code to bootstrap the application with this component.
import { NgModule, Injector } from '@angular/core';
import { CommonModule } from '@angular/common';
import { BrowserModule } from '@angular/platform-browser';
import { createCustomElement } from '@angular/elements';
import { AddToCartComponent } from './add-to-cart.component';

@NgModule({
  imports: [BrowserModule, CommonModule],
  declarations: [AddToCartComponent],
  entryComponents: [AddToCartComponent]
})
export class ElementsModule {
  constructor(private injector: Injector) {}

  ngDoBootstrap() {
    const el = createCustomElement(AddToCartComponent, {
      injector: this.injector
    });

    customElements.define(`add-to-cart-button`, el);
  }
}
Now, that we have registered the custom element, let’s see how we use it. Wait! I almost forgot one thing. For a pleasant development experience, you can add this code to index.ts.
import { platformBrowserDynamic } from '@angular/platform-browser-dynamic';
import { ElementsModule } from './lib/elements.module';

platformBrowserDynamic()
  .bootstrapModule(ElementsModule)
  .catch(err => console.error(err));
If you want to take the next step and build your Angular Elements then Manfred Steyer is your guy. Check out his tool ngx-build-plus and his articles on this subject:
Web component in Angular
It’s time to consume our custom element in Angular. First of all, we need to import it in app.component.ts:
import '@reactangular/elements';
Now, we can use the custom element in app.component.html:
<add-to-cart-button></add-to-cart-button>
Nx does this by default but make sure the target in tsconfig.json is es2015.
If we save and try to run, we get an error message. I wanted to show it since it’s a very nice error that says what we need to do. 😍
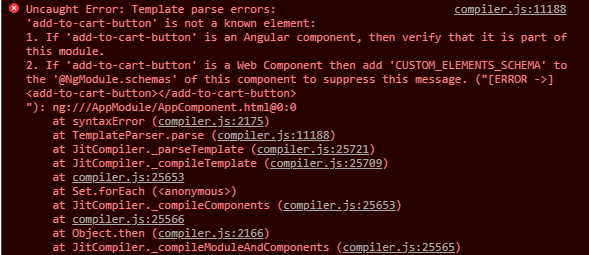
So, since we have a Web Component then let’s do as the message suggests and add CUSTOM_ELEMENTS_SCHEMA in app.module.ts.
schemas: [CUSTOM_ELEMENTS_SCHEMA]
It tells the Angular compiler not to error when seeing non-standard element tags in components’ templates. Now we see our custom element!
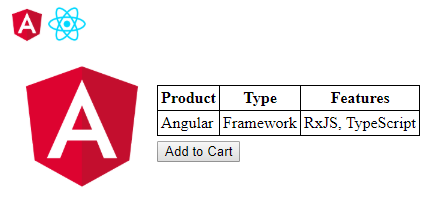
We can set the type to Angular and catch the addToCart event of the button.
<add-to-cart-button type="Angular" (addToCart)="buy($event)"></add-to-cart-button>
If we add a buy function that console logs the event:
buy(type) {
  console.log(type);
}

We can see that the event created by the EventEmitter is a CustomEvent. The data that we emitted, “Angular,” can be seen in the detail attribute, where we can pick it up if needed.
Let’s see how we do the same thing in React.
Web component in React
First, we need to import the custom elements in app.tsx:
import '@reactangular/elements';
When we add the custom element, VS Code starts complaining:

We need to add a intrincic.d.ts file, which serves a similar purpose as CUSTOM_ELEMENTS_SCHEMA in Angular.
declare namespace JSX {
  interface IntrinsicElements {
    [elemName: string]: any;
  }
}
We also need to add a couple of polyfills:
import 'reflect-metadata';
import 'zone.js';
Angular uses zone.js by default for change detection, so you have to make sure that it’s loaded into the browser when using React. Next level would be to turn off zone.js and do manual change detection.
- Do you still think that NgZone (zone.js) is required for change detection in Angular? by Max Koretskyi aka Wizard
Now we can see the component, and if we click it, we can see the type React in the console. The connection from React to the Custom element is working!
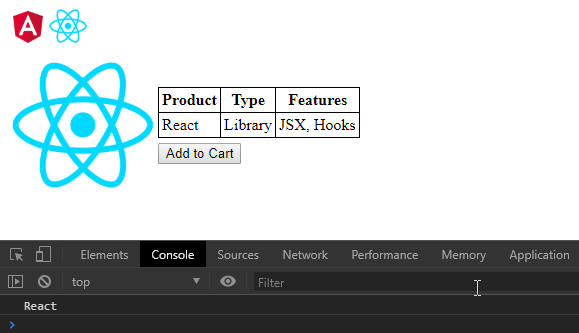
That’s awesome! Let’s create another custom element!
Cart Component
Next, let’s create a shopping cart. It should be an icon with a badge that says how many items we have in the cart.
The best way to create a fully self-contained component is to embed the images into the component using DATA URIs. You would encode the image file into a text format, like Base64, and then use that text data in the src attribute:
<img src="data:image/png;base64,your-base-64-encoded-image-data" />
There are many ways to encode the icon, and one is to run this command in the console (if you are using a good console):
base64 cart.png
After adding the styles, the cart component looks like this:

View Encapsulation
If we add the component to a page and inspect the HTML it looks like this:

Let’s change to ViewEncapsulation.ShadowDom and now we get #shadow-root for our component:

If Custom elements are the way to create a new HTML, Shadow DOM is the way you provide its HTML and CSS. It’s optional, but it provides advantages like CSS scoping and DOM encapsulation.
If we were using ViewEncapsulation.Emulated, we would have to worry about styles bleeding in and out of the component; using ShadowDOM solves this issue by placing the styles inside of the #shadow-root.
You can read more on this here:
Cart component in Angular
Now we need to get the communication between the button and shopping cart to get working.
The cart has an input property named counter that we can pass to it. Let’s create a local counter that we pass to the shopping cart.
<shopping-cart [counter]="counter"></shopping-cart>
Now to see that it works we can add to the counter every time we click the button.
buy(type: CustomEvent) {
  this.counter++;
}
We have communication between our web components!
Let’s see if we can do the same in React.
Cart component in React
To get the communications flowing in the React component, we need a couple of things. First, we need some local state in the constructor:
this.state = { counter: 0 };
Then we can use the counter in the element.
<shopping-cart counter={this.state.counter} />
Next, we need to update the state when clicking the button. For this, we need to reference the button element.
<add-to-cart-button type="React" ref={this.buttonRef} />
And then listen for the button events. We can map the Web Component events in the componentDidMount() life-cycle hook. Only showing the essential parts, it looks something like this:
import React, { Component } from 'react';
import '@reactangular/elements';

class App extends Component {
  private buttonRef;
  constructor(props) {
    super(props);
    this.state = { counter: 0 };
    this.buttonRef = React.createRef();
  }

  componentDidMount() {
    this.buttonRef.current.addEventListener('addToCart', () =>
      this.setState({ counter: this.state.counter + 1 })
    );
  }

  componentWillUnmount() {
    this.buttonRef.current.removeEventListener('addToCart');
  }

  render() {
    return (
      <>
        <shopping-cart counter={this.statecounter} />
        <add-to-cart-button type="React" ref={this.buttonRef} />
      </>
    );
  }
}
export default App;
Or if you are more into hooks, here’s a Gist for that.
And now we should be able to communicate between the components!
Beautiful! We have achieved what we wanted! 🎉
Conclusion
So, in the end we were able to use the same components created with Angular Elements in both Angular and React. I don’t know about you, but I think this is awesome! 🚀 In Angular, it was straightforward to consume and communicate with the custom element. React was a bit more tricky, but not too hard.
Using Nx helped us to get started fast with creating a monorepo with applications and a library. It really shines when you are using multiple frameworks together.
If you are working in an environment with multiple frameworks, then Web Components could be an option. It’s great to be able to share native components with different frameworks. I’m sure you can think of some use cases for them. I only recently dove into this rabbit hole of technologies and I like what I’m seeing! 🐰
Call to Action
I always enjoy feedback, so please 👏, 📝 and tweet 🐦. Follow me on Twitter and Medium for blog updates.