Get Started with your first Angular Library
A step-by-step tutorial to learn Angular libraries

I have been copy-pasting code between projects because I did not find an easy way around it. But with Angular 6 creating libraries got a lot easier so now there are no more excuses for copy-pasting.
In this article, I will create a library and then use it in another project. I will not go too much into details, and what different config files are for but will try to keep this tutorial as short as possible for getting that first library working.
Creating the library
To start when using the CLI to build a library you first need to create a workspace. In Angular 6 we can have one workspace with several applications or libraries. If you do not yet have the Angular CLI installed globally go ahead and do it first.
npm install -g @angular/cli
ng new libraries
Now that this is done you can create your first library.
cd libraries
ng generate library lib-shared --prefix mk
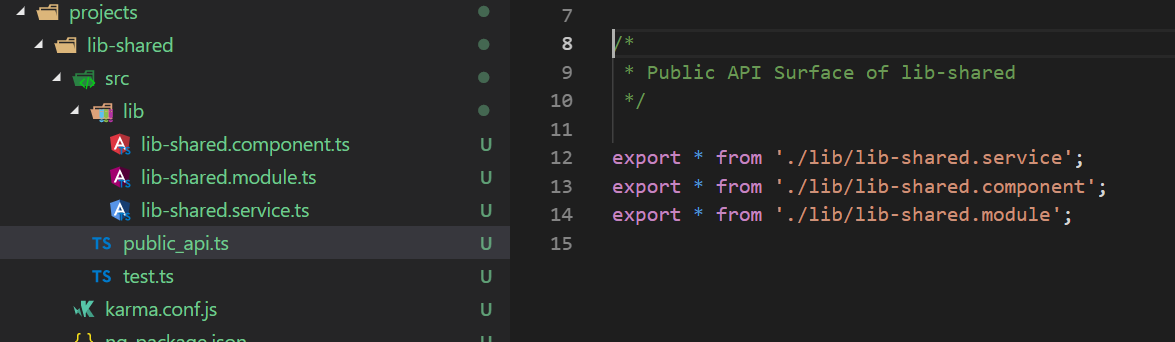
Now you will have a projects folder with your first library called lib-shared.
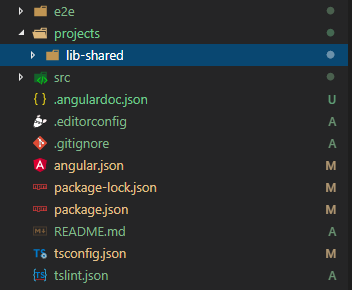
The CLI generates everything needed to have a working library. We get both a component and a service that are ready to use. We can create as many libraries as we want in this one workspace but one will do for us.
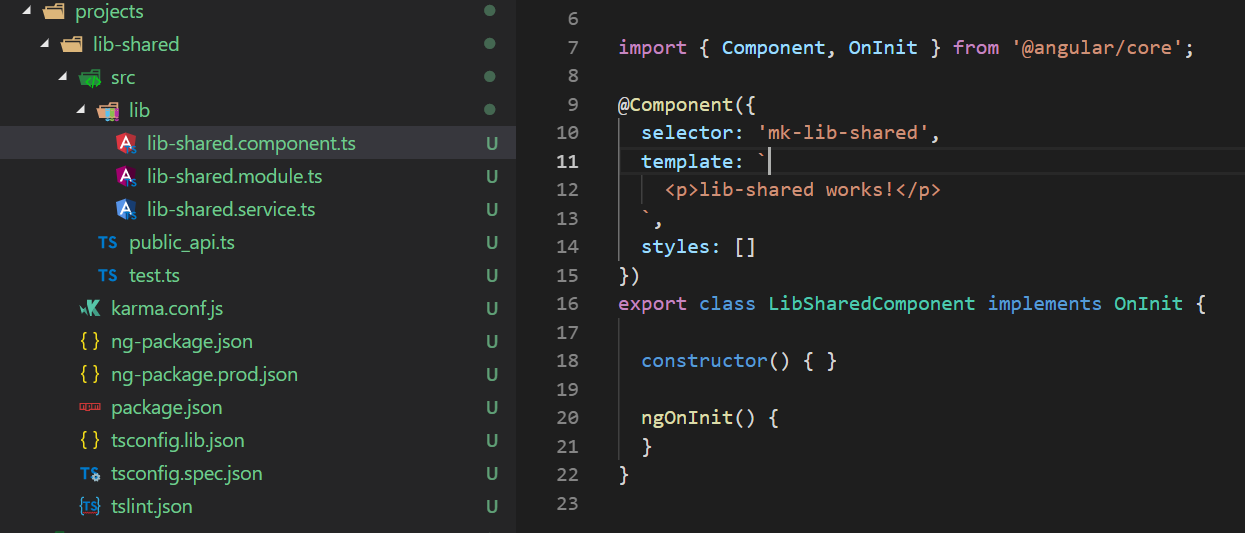
We can see that the selector is named mk-lib-shared* and this is the component that we will try to use from another project. CLI has already done everything that is needed by adding it to the declarations and exports sections in *lib-shared.module.ts.
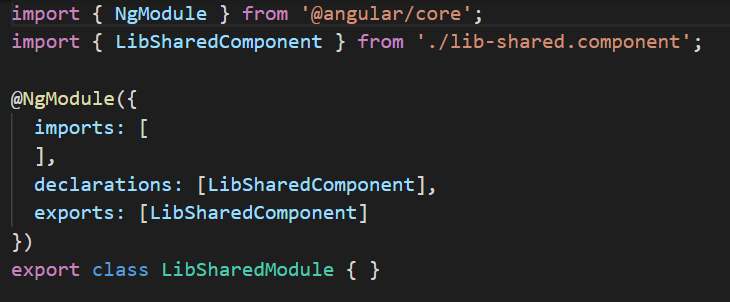
One file that is special for libraries is public_api.ts. This is the entry point to our library and where you should export what you want to be able to import in your projects.
We do not need to explicitly export this component since we are going to import it through our module.
Another thing to notice is that we do not need to add our services to providers anymore. With Angular 6 we can add the new provicedIn attribute to the Injectable decorator. The CLI scaffolds to this as it is the new recommended way to get tree-shakable services.
@Injectable({
    providedIn: 'root'
})
You can use root or any of your modules.
Like this blog post? Share it on Twitter! 🐦
Building and packing the library
Build your library with the help of the CLI.
libraries> ng build lib-shared
If everything goes as it should you now have your library built in the dist/lib-shared folder. Let’s go to that folder and run the pack command.
libraries\dist\lib-shared> npm pack
This command packs your library to a tarball named lib-shared-0.0.1.tgz. Now we have our library packed and ready to be used from another project. Let’s go on and create a new project and see what we need to do to use our library from it.
Dependencies
Dependencies can get a bit confusing since you have more than one package.json at your disposal.
You should only have a node_modules* directory in the root of your project, not within the library’s directory. So if your library needs 3rd party packages, then you should add them to the dependencies of your root package.json. The *devDependencies also go here.
In your library’s package.json you should only add peerDepencies. These dependencies tell the users of your library which packages are needed if they want to install your package. So you don’t need to have anything here to get things working. I will not add anything here in this article.
Using the library
Let’s start by creating the other project where we are going to use our library.
ng new other-project
Now lets open package.json and add our library to it. We can do it by adding a relative path to it.

Now we can install it.
npm i
And now that we have installed it to node_modules we can import it in app.module.ts as any other package.
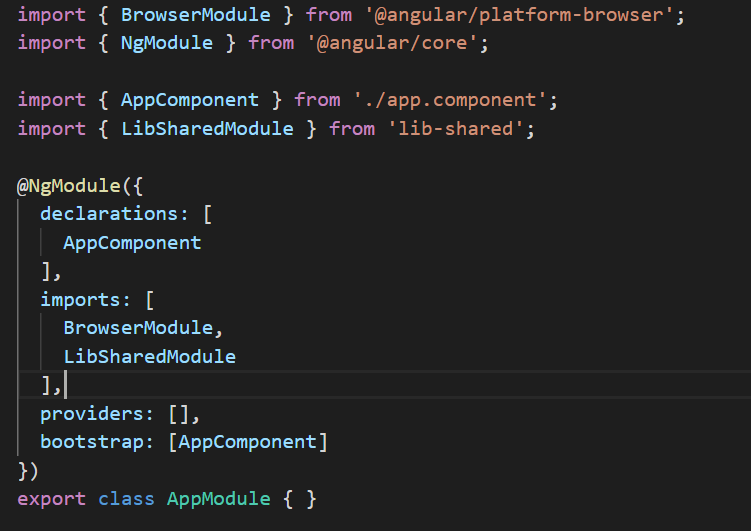
Adding it to the imports section is all that is needed to be able to use our component. Lets change app.component.html use our tag.

All that is left now is to build our project and see if the component is working.
npm start

And that’s it!
As you can see it is quite easy to create your libraries with the new CLI. So no more excuses, stop copy-pasting and create your library!
Call to Action
I always enjoy feedback so please 👏, 📝 and tweet 🐦. Follow me on Twitter and Medium for blog updates.
Update1: In my article Custom Angular Pipes and Dynamic Locale I add some custom pipes and service to this library.
Update2: There is now a way to create a workspace without the initial application: Angular Workspace: No Application for You!